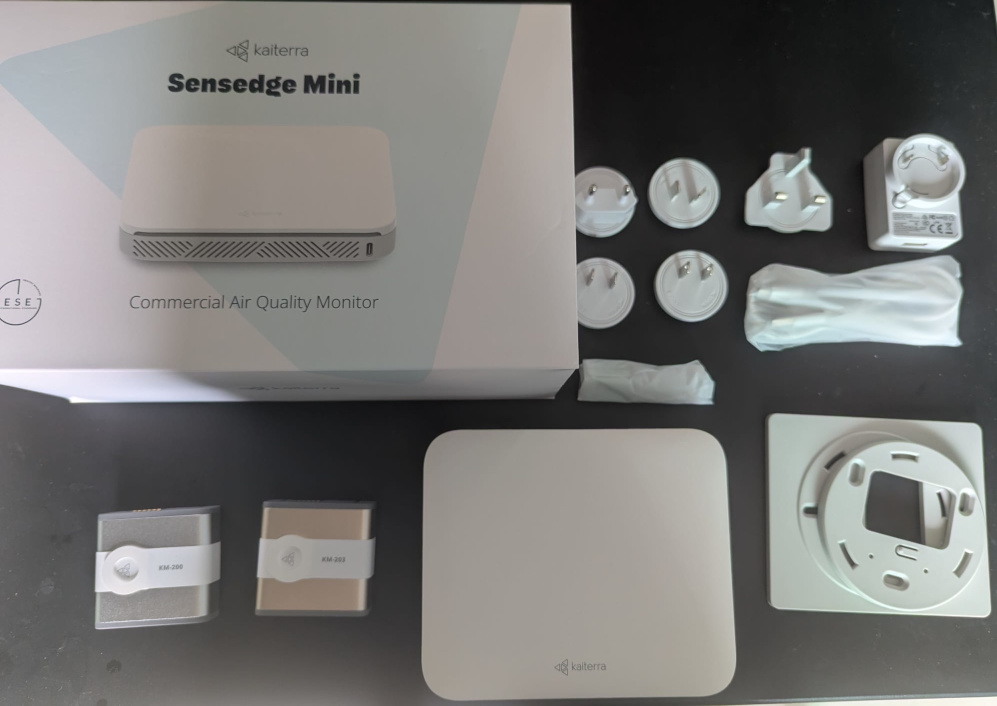
I've recently come into a Kaiterra Sensedge Mini and spent some time integrating it into my Home Assistant setup. The Kaiterra Sensedge Mini is a commercial grade Air Quality Sensor capable of monitoring CO2, TVOC, PM2.5, PM10, Humidity and Temperature. The easiest route to integrating with Home Assistant is through MQTT. Since I am using Home Assistant container, I had to run a mosquitto docker container first. Since mosquitto by default on port 1883 does not provide any protocol encryption, it seemed pointless to setup a password, hence I allowed anonymous access
 1
 2
 3
 4
 5
 6
 7
 8
 9
10
11
12
13
14
15
16
17
18
19
20
21
22
23
24 | # cat /mosquitto/config/mosquitto.conf
persistence true
persistence_location /mosquitto/data/
log_dest file /mosquitto/log/mosquitto.log
listener 1883
## Authentication ##
allow_anonymous true
password_file /mosquitto/config/mosquitto.passwd
# create a mosquitto user anyway
mosquitto_passwd -c /mosquitto/config/pwfile mosquitto
# cat docker-compose.yml
...
mosquitto:
image: eclipse-mosquitto
network_mode: host
volumes:
- ./mosquitto/config:/mosquitto/config
- ./mosquitto/data:/mosquitto/data
- ./mosquitto/log:/mosquitto/log
...
# docker compose up -d
|
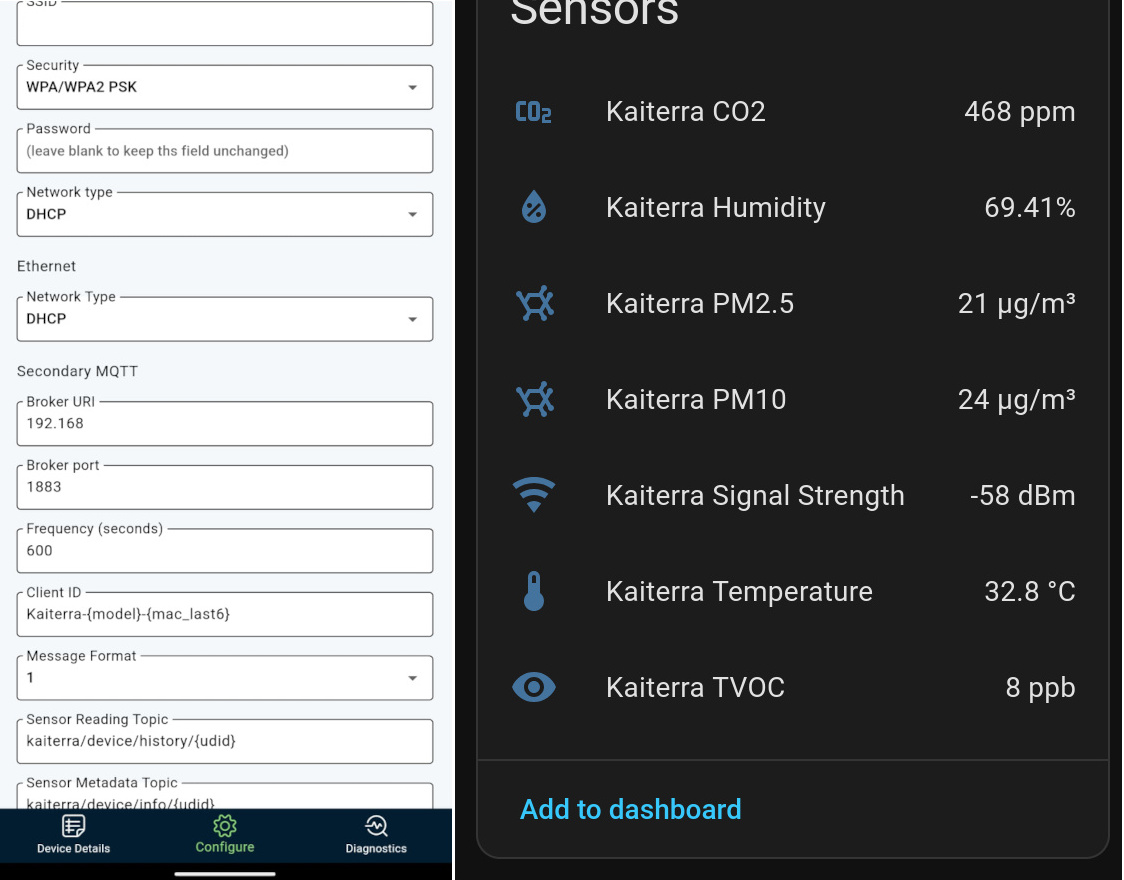
After mosquitto is running, it was time to setup the Sensedge Mini. At this point, you will want to download the Kaiterra Enterprise Configuration Tool from their website. Insert the modules and power it up, it will start advertising a network with "Kaiterra" in the name. I had good results with the Windows version and the Android apk and struggled with the Linux one. Do not download from Google Play, the version on Google Play requires a Kaiterra account and there is no way to create one. You will only be given a Kaiterra account if you purchased it from an authorized channel. After connecting to the Wifi network and starting the tool, you will enter the configuration page where you can setup the WiFi network to connect to as well as the MQTT server IP address and credentials. At this point, it is important to note down the udid, or you would have to reconnect to it again. If you did the setup correctly, you would see the device connecting on the MQTT server logs
| cat mosquitto.log
1772187934: Client Kaiterra-SE-200-ffffff [(null):0] disconnected: session taken over.
1772187934: New client connected from 192.168.10.111:62758 as Kaiterra-SE-200-fffff (p4, c0, k60).
|
Now, we shift our focus to Home Assistant, you will need to Add integration, select MQTT and set it up with the IP address and credentials. Once that is done, the easiest way is to setup the sensors by adding the following lines to configuration.yaml and restarting Home Assistant.
1
2
3
4
5
6
7
8
9
10
11
12
13
14
15
16
17
18
19
20
21
22
23
24
25
26
27
28
29
30
31
32
33
34
35
36
37
38
39
40
41
42
43
44
45
46
47
48
49
50
51
52
53
54
55
56
57
58
59
60
61
62
63
64
65
66
67
68
69
70
71
72
73
74
75
76
77
78
79
80
81 | mqtt:
sensor:
# 🌡 Temperature
- name: "Kaiterra Temperature"
unique_id: kaiterra_temp_0fffffff
state_topic: "kaiterra/device/history/udid-here"
value_template: "{{ value_json.data.rtemp }}"
unit_of_measurement: "°C"
device_class: temperature
state_class: measurement
device:
identifiers: ["kaiterra_0fffffff"]
name: "Kaiterra Air Monitor"
manufacturer: "Kaiterra"
model: "VG21D21021"
# 💧 Humidity
- name: "Kaiterra Humidity"
unique_id: kaiterra_humidity_0fffffff
state_topic: "kaiterra/device/history/udid-here"
value_template: "{{ value_json.data.rhumid }}"
unit_of_measurement: "%"
device_class: humidity
state_class: measurement
device:
identifiers: ["kaiterra_0fffffff"]
# 🫁 CO2
- name: "Kaiterra CO2"
unique_id: kaiterra_co2_0fffffff
state_topic: "kaiterra/device/history/udid-here"
value_template: "{{ value_json.data['rco2 (ppm)'] }}"
unit_of_measurement: "ppm"
device_class: carbon_dioxide
state_class: measurement
device:
identifiers: ["kaiterra_0fffffff"]
# 🌫 PM2.5
- name: "Kaiterra PM2.5"
unique_id: kaiterra_pm25_0fffffff
state_topic: "kaiterra/device/history/udid-here"
value_template: "{{ value_json.data['km200.rpm25'] }}"
unit_of_measurement: "µg/m³"
device_class: pm25
state_class: measurement
device:
identifiers: ["kaiterra_0fffffff"]
# 🌪 PM10
- name: "Kaiterra PM10"
unique_id: kaiterra_pm10_0fffffff
state_topic: "kaiterra/device/history/udid-here"
value_template: "{{ value_json.data['km200.rpm10'] }}"
unit_of_measurement: "µg/m³"
device_class: pm10
state_class: measurement
device:
identifiers: ["kaiterra_0fffffff"]
# 🧪 TVOC
- name: "Kaiterra TVOC"
unique_id: kaiterra_tvoc_0fffffff
state_topic: "kaiterra/device/history/udid-here"
value_template: "{{ value_json.data['km203.rtvoc (ppb)'] }}"
unit_of_measurement: "ppb"
state_class: measurement
device:
identifiers: ["kaiterra_0fffffff"]
# 📶 WiFi Signal
- name: "Kaiterra Signal Strength"
unique_id: kaiterra_signal_0fffffff
state_topic: "kaiterra/device/history/udid-here"
value_template: "{{ value_json.data.signal_strength }}"
unit_of_measurement: "dBm"
device_class: signal_strength
state_class: measurement
device:
identifiers: ["kaiterra_0fffffff"]
|
Enjoy.